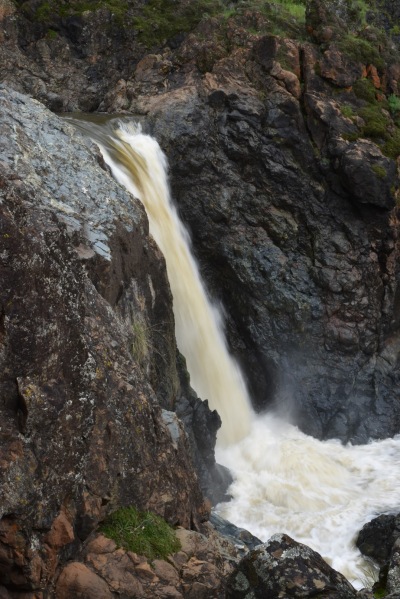
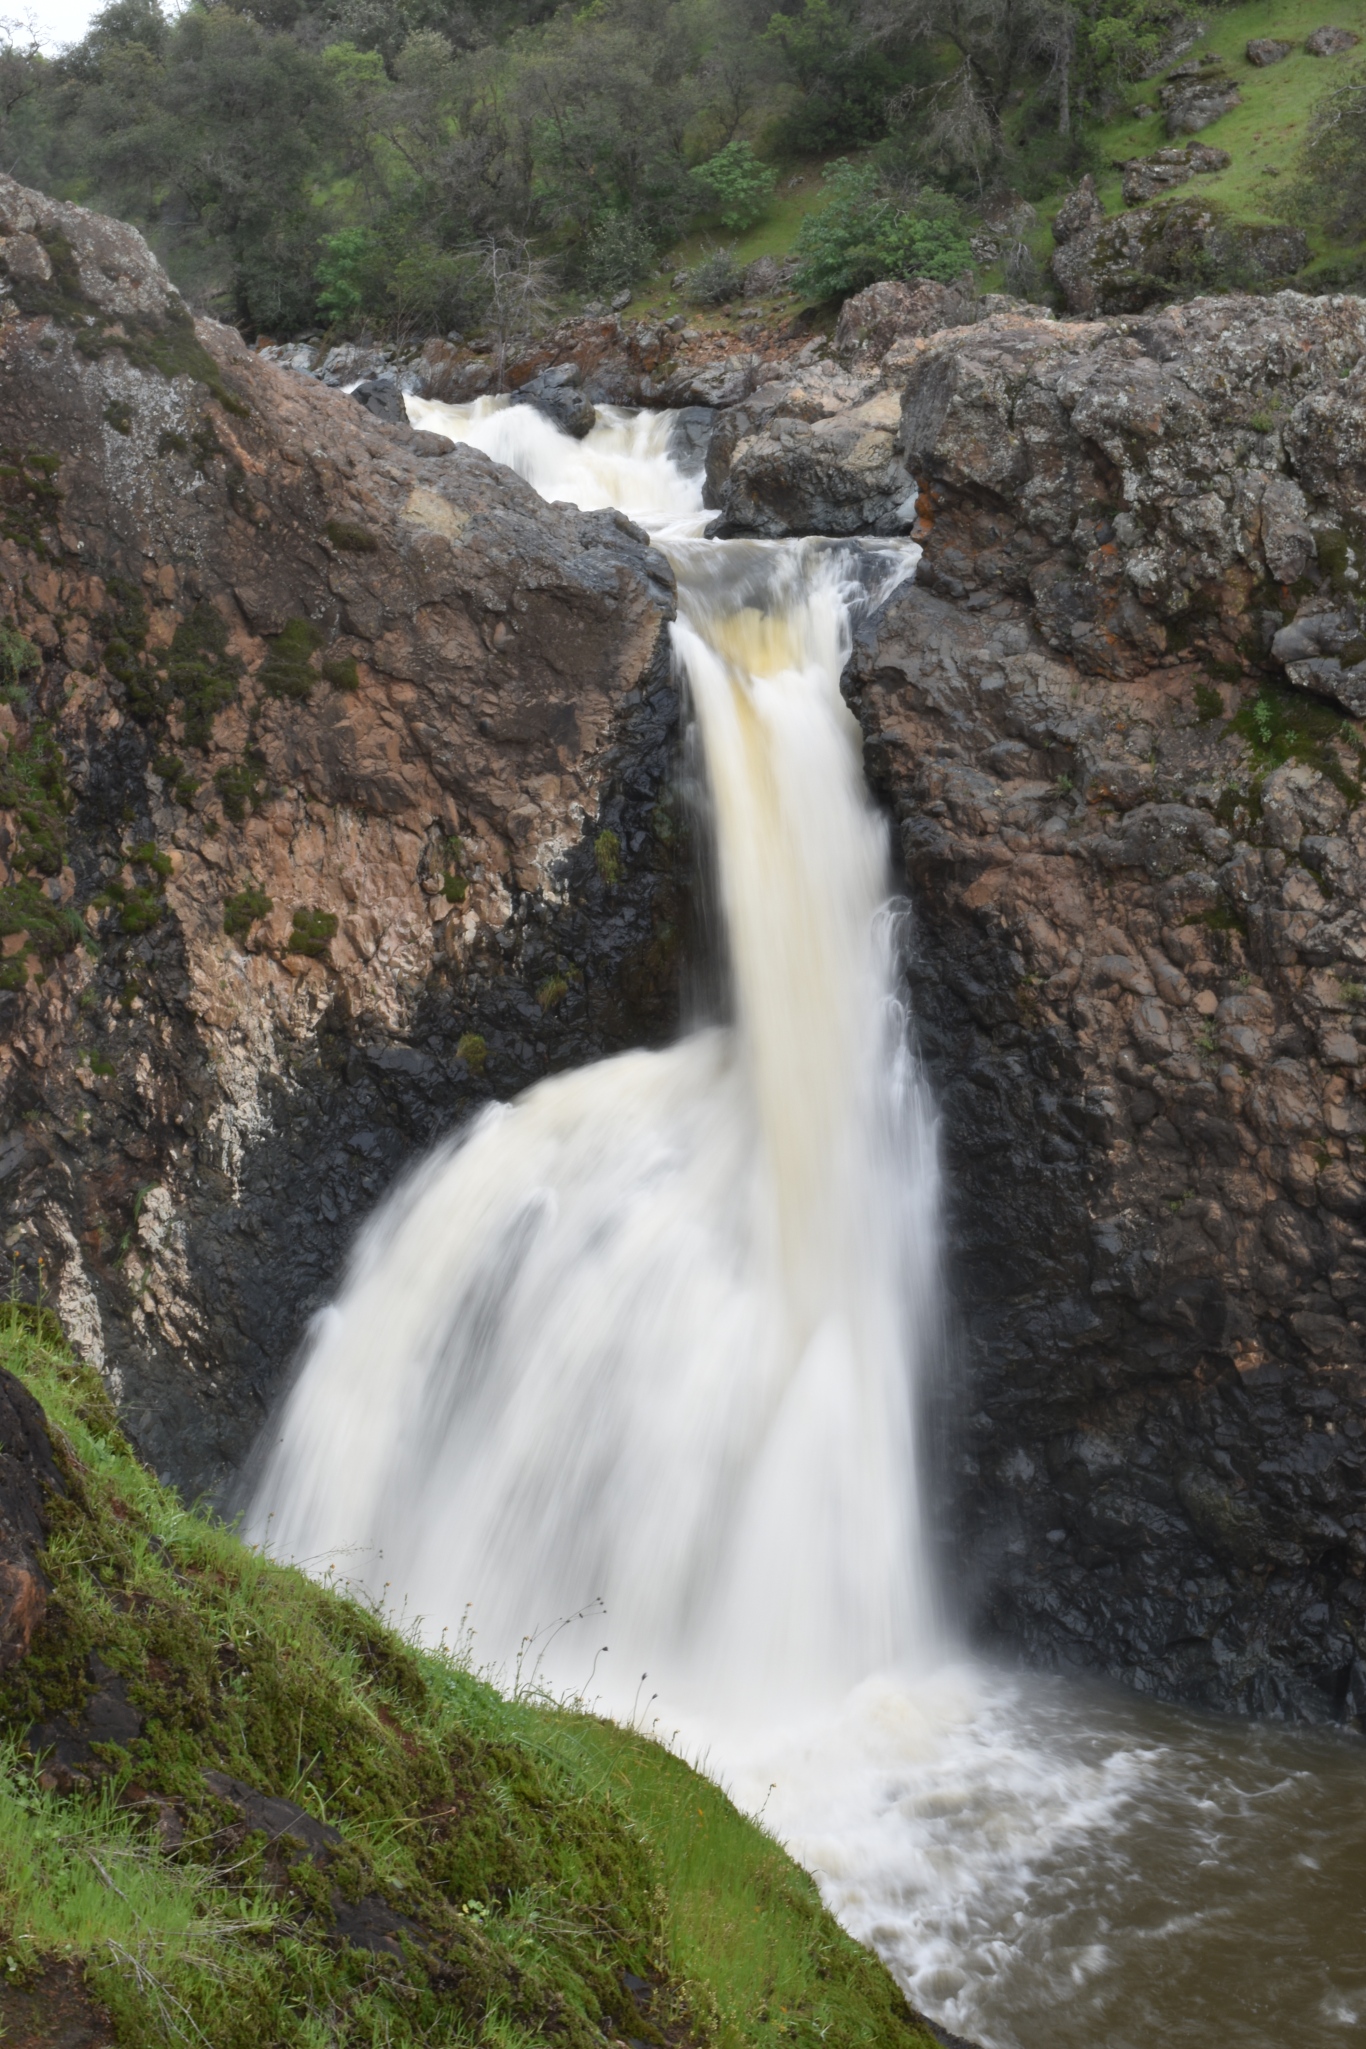
Borrego Palm Canyon Falls, California

I’m not sure how I ended up visiting Anza-Borrego Desert State Park to look for waterfalls. There are a few waterfalls in the California deserts, and there is a small waterfall here. I think I looked in some book that mentioned a waterfall in the park, and I was in San Diego in late December, and figured I would head out to the park.

The cascade is found on the Borrego Palm Canyon Nature Trail, at least this one. The fascinating thing about the trail is that there are (or possibly were) some native California palm trees at the “end” of the trail. The California State Parks website mentions that access to the palms is currently closed, but that you can still hike the trail to an overlook to see how the palms are recovering from a wildfire. I don’t remember exactly where the falls were on the trail.

I wasn’t sure if this was the falls that I was supposed to find. It wasn’t a large waterfall, though there was definitely water “falling”. I recorded it anyway! The waterfall itself might not be the main attraction, but the canyon was very beautiful, and that was worth it. The hike is best done in the cooler months of the year due to extremely high temperatures in the summer months.

Directions:

  1. You may be approaching the state park from different directions, but you’ll be heading toward Borrego Springs. Borrego Springs is found on County Road S22.
  2. The park entrance is located near where S22 switches names from Montezuma Valley Road to Palm Canyon Drive.
  3. At that “intersection”, take a left. I believe you’ll notice the entrance to the state park pretty clearly from here.
  4. The visitor’s center comes first, but continue along to the campground and then to the trail head/parking area of the Borrego Palm Canyon Trail.
  5. The round-trip length of the hike is listed below, but I don’t remember whether I had to hike all that distance to see the falls. And it sounds like it’s currently shorter anyway because of the wildfire-affected areas.

Accessibility: 8/10 (easy/moderate)
Height: 6′
Length of Hike: 3 miles round-trip

Borrego Palm Canyon Falls in December 2013

Where in the World is Borrego Palm Canyon Falls?

Slaughter Ravine Falls, California

Slaughter Ravine Falls was not a waterfall I was searching for…it found me. I was visiting California and before a conference, I flew into Sacramento. I headed northeast along I-80 to visit a friend in Colfax. They showed me around Colfax, and as we were going downhill toward the North Fork of the American River, I noticed a rather large waterfall. I didn’t get a chance to photograph the waterfall then, so I headed back downhill.

Slaughter Ravine Falls in March 2016

There really isn’t an official parking area or a sign for the approximately 300′ waterfall, which I guess in northern California might not be surprising since there are a lot of tall and impressive waterfalls. There is a parking area before you cross over the American River, but I don’t think it’s designated for the falls. I don’t remember if I stopped here to get a photo of the falls or if I crossed the river and then took a picture of the falls from across the American River. (Looking back, I have some pictures that seem to be very close to the base of the falls, so I parked somewhere and got out to take a look…)

Because there’s no hike involved with Slaughter Ravine Falls, it could be a nice waterfall to add to your list without difficulty…but then it also makes it less worthwhile to drive out of the way to view the falls. There is also another waterfall in another ravine, Pennyweight Falls. So if you decide to go out of the way, you can add two waterfalls to your list, and there may be more in the area.

irections:

  1. From I-80, take exit 135. (I was heading north on I-80.)
  2. You’ll take a right on Canyon Way. (It’s a very short distance…could be a bit confusing.)
  3. Continue on Canyon Way to Iowa Hill Road. Turn left onto Iowa Hill Road.
  4. Follow Iowa Hill Road down to the Iowa Hill Road Bridge (with Mineral Bar on the other side of the river). Pennyweight Falls can be viewed from the last “sharp” curve before you reach the bridge.
  5. Slaughter Ravine Falls can be viewed after that sharp curve by looking uphill to the left of the road you just drove down.

Accessibility: 10/10 (easy)
Height: ~300′
Length of Hike: roadside

Where in the World is Slaughter Ravine Falls?

Feather Falls, California

Feather Falls (30)

Feather Falls in March 2016

I thought I would have written about Feather Falls already. The adventure getting to Feather Falls was definitely interesting, to say the least. Though once I had finally reached Feather Falls, it was definitely worth it!

I probably didn’t pay attention as much to the directions about the loop trail that exists, even as I’m reading it now. Realize there is an upper loop trail at 4.5 miles to the falls, and a lower loop trail at 3.5 miles to the falls. As many people probably think, let’s choose the shorter portion since it will be quicker. It is not, very simply. It is actually much more difficult to hike, at least when I visited in early March 2016. The lower loop trail seems to be constant up and down, and I would describe that trail as more “rustic”. It had been raining significantly the days before I arrived at the falls, and so the lower loop trail became very muddy, and in some parts had essentially a small but steady stream of water flowing downhill. I was soaked and muddy after doing the lower loop portion first. To get to the viewpoint for Feather Falls, you then steadily climb uphill, though it’s rather short. Unluckily, my knee decided to buckle and there was some definite pain, and I still had to return to the parking area. Luckily, I wasn’t injured where I couldn’t get back.

If I were to go on this hike again, I would absolutely recommend using the upper loop trail for the whole hike. There wasn’t any view on the lower loop trail that was remotely worth the difficulty. The upper loop trail was much more enjoyable, even with a knee in pain.

Once you reach the falls, as I mentioned, the whole hike becomes absolutely worth it. At 410′ tall, Feather Falls is stunningly beautiful. The scenery and geology around the falls is amazing. You definitely feel like you’ve entered Yosemite National Park (which isn’t really wildly far away.) So even though it might be a moderate/strenuous hike, it’s still a hike you should do if you love waterfalls!

Directions:

  1. I stayed in Oroville. If starting from Oroville, head east on CA-162. Drive 4-6 miles on CA-162 east, depending on where you start in Oroville.
  2. Turn right on Forbestown Road, and drive for 6 miles.
  3. Turn left onto Lumpkin Road and drive 11 miles.
  4. Turn left onto Bryant Ravine Road and drive just under 2 miles to the trail head.
  5. Choose which part of the loop you want to hike, and head to the falls.

Accesibility: 4/10 (Moderate/Strenuous)
Height: 410′
Length of Hike: 7.4 to 9.8 miles round-trip

Where in the World is Feather Falls?

Amargosa Falls, California

I haven’t been visiting many major waterfalls lately. Instead, I’ve been tending to search for some of the more unknown waterfalls that are nearby where I’m currently traveling. This means finding waterfalls like Amargosa Falls, a waterfall in the California desert…

Amargosa Falls is a bit south of Death Valley, where you can find another interesting desert waterfall, Lower Darwin Falls. Being in Death Valley, Darwin Falls gets a bit more advertising than Amargosa Falls. It is taller too, but both waterfalls are interesting in their own way.

The starting point of the hike to Amargosa Falls is interesting in its own right. For directions sake, set your GPS to the China Date Farm in Tecopa, California. This is an actual date farm, and they make a variety of different date products. (It smells really good in there!) On the opposite side of the parking lot near the picnic area is where the trail to the falls starts.

The hike to the falls is relatively easy from a hiking perspective. The directions can get a bit confusing at one turn, but luckily someone else on the trail pointed out that it didn’t seem like this was the right direction to the falls. Even if you miss the turn to the falls, you’ll still be able to see a pretty neat slot canyon.

Once you get to the falls, you’ll be greeted with a unique waterfall. If you arrive at the crest of the falls, you won’t even see the whole thing. It’s a bit different than most other waterfalls. As you might be able to tell, the river right above the falls is almost completely overgrown with brush. If you’re standing a few feet “behind” the falls, you wouldn’t even see a river… very odd, to say the least. Climb down a bit, and you’ll find the waterfall is wider than expected, almost forming a horseshoe. It’s an unexpected find in this dry, colorful desert landscape.

Directions:

  1. Set your GPS to the China Date Ranch Farm in Tecopa. From the Old Spanish Trail Highway in Tecopa, turn south onto Furnace Creek Road, and then a few miles later, turn right onto China Ranch Road. The signs are pretty clear. The road is mostly paved with the exception of the last mile or so, and it’s not difficult to drive down.
  2. Head toward the picnic tables at the edge of the parking area to start your hike.
  3. At 0.25 miles in, there will be a Nature Conservancy sign at a fork. Take the right fork of the trail. You will then pass an old building that they’ve tried to stabilize.
  4. Keep hiking until you reach a hill with a information sign in the center. (This will be just under 1 mile from the start of the hike.) Survey the land a bit. To your right will be the remnants of a railroad bed extending off a ways. To your left is another trail, and directly ahead of you is a dry river bed that will lead you to a slot canyon.
  5. To reach the falls, you want to take the switchback down this hill and then veer sharply right toward the railroad bed. You’ll pass the remnants of a mining operation. Follow this raised railroad bed for about 0.75 miles.
  6. Shortly before the waterfall, you’ll see a worn sign for “Waterfall.” Follow this sign and you’ll soon arrive at the falls.

Accessibility: 8/10 (easy/moderate)
Height: ~7′
Length of Hike: 3.5 miles round-trip

DSC_0032

Amargosa Falls in March 2018

Where in the World is Amargosa Falls?

Pennyweight Falls, California

Pennyweight Falls (23)

Pennyweight Falls in March 2016

Pennyweight Falls isn’t one of those waterfalls I set out to find. I had visited a friend in northern California, and he mentioned that there were a waterfall not far from him. As I was driving down Iowa Hill Road, which is relatively steep and a bit narrow at times, I noticed a waterfall off to the corner of my eye. I had to be careful, as sometimes I get a bit distracted by waterfalls, so I kept going, and then turned around. The road continues on for a ways, but I just wanted to find these waterfalls.

At the bottom of the road as you cross a bridge over the North Fork of the American River, you can see Slaughter Ravine Falls. It’s the more obvious of the two falls. Pennyweight Falls is the waterfall off to the side, and to view the falls better, you have to pull off to the side of the curvy road. Luckily, there was enough room to pull off. Another car was parked, and it seemed there might be some trail you could follow. I decided to get a shot of Pennyweight Falls, and continue on my journey. It wasn’t until later that I found out I had viewed a recorded waterfall.

Directions:

  1. From I-80, take exit 135. (I was heading north on I-80.)
  2. You’ll take a right on Canyon Way. (It’s a very short distance…could be a bit confusing.)
  3. Continue on Canyon Way to Iowa Hill Road. Turn left onto Iowa Hill Road.
  4. Follow Iowa Hill Road down to the Iowa Hill Road Bridge (with Mineral Bar on the other side of the river). Pennyweight Falls can be viewed from the last “sharp” curve before you reach the bridge.

Accessibility: 10/10 (easy)
Height: ~400′
Length of Hike: roadside

Where in the World is Pennyweight Falls?

Lower Shingle Falls, California

lower shingle

Lower Shingle Falls in March 2016

I was trying to find this waterfall in my photo database, and was having a bit of a difficult time, and then I remembered…this is the waterfall with many names. Shingle Falls is also known as Beale Falls, Dry Falls, and Fairy Falls. But don’t let that one slightly confusing aspect stop you from visiting the falls.

I visited the falls just over one year ago in March 2016. I decided to split these out as two separate falls, the Lower Shingle Falls described here and the Upper Shingle Falls described previously. (Information about the drive and trail are found there, so check that out.) While both falls are close to each other, you can’t see both falls at the same time, and they have different enough personalities that they should be distinct. The upper falls do require just a bit more effort to get to, depending on the path you take.

At this time in March 2016, the rains had started. Both Upper and Lower Shingle Falls were impressive. The ground was slippery enough that it made the hike to the falls (and between the falls) rather muddy and slippery. I had hurt my knee the day before, and going downhill between to get from the Upper to Lower Falls was somewhat painful. Add some crazy cows to the mix, and it was definitely a memorable hike in a beautiful area.

Directions:

  1. There are a number of different ways to arrive at the falls, though they all lead in the same general direction.  I was on CA-70 and entered the town of Marysville. I then took a left onto CA-20 (which you could follow toward the same set of roads).
  2. I turned left onto Ramirez Street, which turned into Simpson St.
  3. I then turned left onto Hammonton Smartsville Road. This is the road to focus on, because you will likely end up on this at some point, no matter the path.
  4. I drove just about 15 miles to the intersection of Hammonton Smartsville Road and turned right onto Chuck Yeager Road.
  5. I then drove 4.5 mile south on Chuck Yeager Road to Waldo Road. Waldo Road is a dirt road to your left, and it was somewhat easy to miss.
  6. Turn left on Waldo Road, and drive for two miles.
  7. Then take a left on Spencerville Road. Drive another 2 miles to the “end” of Spencerville Road. You will end up at a bridge that you cannot drive over and a large parking area.
  8. From this parking area, start along your journey. Cross the bridge over Dry Creek, and take a right immediately after crossing the bridge. You are actually still on Spencerville Road, just hiking now.
  9. Walk about a mile or so, and you will see a white fence/guardrail to your right that you can open. Turn right along this path, and walk along what is the obviously beaten path.
  10. After a 0.2 miles or so, you’ll see signs for the Upper and Lower Falls, each branching off. You will also be able to continue along a wider path to the falls. (The cows were on the wide path.) As long as you follow the creek, it tends to be difficult to miss the falls.

Accessibility: 6/10 (moderate, depends on the path, whether there are cows, and the last few hundred feet are uphill for sure, though less so for the Lower Falls)
Height: 29′
Hike: ~5 miles round trip

Where in the World is Lower Shingle Falls?

Tip Toe Falls, California

dsc_0925

Tip Toe Falls in November 2016

For all of the rain the San Francisco Bay area seems to get, it can be difficult to find waterfalls flowing in the region, especially in the summer and fall (when it tends to be drier). In October, I tried to find Brooks Falls (which is in San Pedro Valley County Park). While I think I found the location of the falls, there was literally no water flowing. And this was after it had rained in the previous 24 hours, but apparently not at the location of the falls.

So I arrived again, wondering whether I’d find any falls. It had been raining yet again, so my hopes were high. This time, I had better luck, finding both Tip Toe Falls and Castle Rock Falls, with Tip Toe having the higher flow.

Tip Toe Falls is in Portola Redwoods State Park west of San Jose. The drive to falls from San Jose isn’t a quick drive, as it’s mostly on winding curvy roads. And yet the drive is beautiful. After arriving at Portola Redwoods and paying the entrance fee, I started on my journey. You’ll have to choose carefully. There are a number of trails, and I was a bit confused about where to start…so I chose to start on the Iverson Trail near the visitor’s center. It ends up that about 0.5 miles in, there’s a “seasonal” bridge over Pescadero Creek. The creek was flowing well but the bridge was not over the creek. I really didn’t want to get wet so I turned around.

After arriving back at the parking lot, I decided to head toward the parking areas near one of the campgrounds. After driving over the bridge spanning Peters Creek, I veered to the right and parked in an area near the Circle Group Campground (which doesn’t require you to enter any campground). From there, I started the hiking up the road for a bit past the gate on the road and then veered to the right onto a trail that led in the direction of the Tip Toe Falls trail. It wasn’t very clearly marked. (I later found out if you keep walking along that road for maybe 0.15 miles more, you’ll end up at a sign that clearly indicates Tip Toe Falls).

From there, you connect into the Tip Toe Falls trail. I followed the signs for the falls, though realize you will end up at a creek crossing (across Pescadero/Falls Creek). In this case, I was able to find rocks sticking out the creek that I could use to cross the creek with minimal waterlog. I then continued to follow the signs to Tip Toe Falls, which meant I was walking along a trail that at times also seemed to be a flowing stream. Just when it seems like you’re not going to find the falls, you will! They’re off in a little cove, and while they’re not tall, they’re surrounded by beautiful ferns. I had the falls to myself, and it was honestly wonderful.

Directions:

  1. You need to end up on Portola State Park Rd. There are two options: One is to take exit 20 off of I-280 and drive southwest along Page Mill Rd until you end up at the Portola State Park. It’s not a short distance. The other is to take CA-35 (Skyline Boulevard) until you get to Page Mill Rd, then turn onto Page Mill Rd heading southwest.
  2. Once you arrive at Portola State Park Rd, which will be on your left if heading southwest, drive along the road to enter the park. As I said, the easiest path may be to pay at the visitor’s center, then continue over Peters Creek and park at one of the parking areas near the campgrounds. (Obtaining a map will help greatly.)
  3. Start the hike to the falls. With this one, expect to backtrack a bit.

Accessibility: 5/10 (moderate, not super steep at any point, but it does require a bit of agility)
Height: 6′
Hike: ~2 miles round-trip

Where in the World is Tip Toe Falls?

Horsetail Falls, California

dsc_1697

Horsetail Falls in early June 2013

There are a number of waterfalls in the Lake Tahoe region, and I haven’t even begun to scratch the surface. When traveling by myself, I tend to visit those that are easy to find or are well traversed. And Horsetail Falls is both easy to find and well visited.

At ~800′ tall or so, that could explain why it’s relatively popular. When I arrived in late May, the sun was shining and the parking lot was full. So full that I had to park along a portion of dirt side-road to the east of the official parking area. Others were parked there, and there didn’t seem to be any signs indicating it wasn’t allowed (though if that changes, please follow posted signs). Even if you can’t find parking, you can still see the falls, as they’re so large!

And while there’s supposedly a clear trail to the falls, I must admit it felt more like most people wandered around the area. The trail that leads to the falls ends up at a wilderness boundary, and you must sign a book indicating you’re entering the wilderness area. That’s if you want to get up close and person with the falls. I decided after wandering around for a while that I had enjoyed the waterfall enough from afar, though in the future I might check it out closer now that I know the general direction to head. I felt that I had some pretty awesome views without getting truly up close and personal.

Directions:

  1. From South Lake Tahoe, take US-50 south. At the intersection of US-50 and CA-89, continue along US-50.
  2. After just a few miles, you’ll be descending pretty quickly and after a few rather sharp turns, on your left will be the parking area for the falls. (You’ll be able to see the falls even before you arrive, and the Horsetail Falls parking area is also clearly marked. (There may be a fee to enter the area.)
  3. From the parking area, head toward the falls, following the path toward the wilderness area if you’d like to see the falls up-close and personal.

Accessibility: 7/10
Height: ~790′
Hike: ~3 miles round-trip (I probably only walked 2 miles or so)

Where in the World is Horsetail Falls?

Sempervirens Falls, California

DSC_0285

Sempervirens Falls in April 2016

I like to head out to California for short trips, and San Francisco is one of the best places to start a journey. There are so many different things to be viewed in the area. There are a number of waterfalls in the area, but they’re spread out in all different directions. (Check out Mountain View FallsAlamere Falls, and McWay Falls as examples.) In Big Basin Redwood State Park south of San Francisco, there are a few waterfalls that require significant hikes to arrive at (Berry Creek Falls and Silver Falls). I didn’t hike to those falls since I had no wish to go that far. So instead I hiked to Sempervirens Falls.

I tend to get a late start (not a morning person), so when I arrived at Big Basin SP, parking was at a minimum for a beautiful Saturday in April. Parking is found along Escape Road, and I kept driving. The cars were parked alongside, so I just kept going. I found ample parking at the end of Escape Road, and realized that it would be easier to take a completely different path than I had originally planned.

At the end of Escape Road, I headed north past the fence where Escape Road officially “ends”, though it continues as a walking path. After a few hundred feet, I took a sharp right onto the Sequoia Trail. I continued along this path, crossing CA-236. The Sequoia Trail continues downhill to the falls (which are to your right as your reach Sky Meadow Road. The most difficult portion of the hike is the uphill climb on the return.

I’m not sure I’d go out of my way to see Sempervirens Falls, though the surrounding redwoods make up for the smaller than expected waterfall. It’s at most 20′ tall, and is rather narrow. Still, enjoy the scenery!

Directions:

  1. From CA-9, head in the general direction of CA-236. (CA-236 forms a loop so that you can connect from the north or south along CA-9.)
  2. CA-236 loops through Big Basin Redwood State Park. It’s a rather narrow road.
  3. Pay the entrance fee, and then find parking. If you find parking close to the entrance, you can follow the Sequoia Trail to the falls by heading north. Since I found parking as described above, I found the Sequoia Trail by the opposite direction.

Accessibility: 6/10 (steep uphill climb on the way back)
Height: ~20′
Hike: ~2 miles round trip

Where in the World is Sempervirens Falls?: map

Upper Shingle Falls, California

DSC_0199

Upper Shingle Falls in March 2016

I’m going to paraphrase here, but as someone said, “Sometimes the journey is more interesting than the destination.” Now let me start by saying: I think Upper and Lower Falls are really beautiful, so they’re definitely interesting…but I’ll probably remember the journey 20 years from now more than the waterfalls.

The pair of Shingle Falls (also known as Beale Falls, Fairy Falls, or Dry Creek Falls) are out in an interesting location in California. They’re right near Beale Air Force Base, and yet you wouldn’t necessarily know as you’re hiking through the grazing lands. My first adventure was getting to the parking lot. I almost entered the AFB, which I’m not sure would have been an issue because the road was open…that’s what Google Maps told me to do, but it ends up that while their location for Shingle Falls is correct, it’s not the correct way to drive. One of the other books I had with me mentioned a road that I had just passed. Luckily, I backtracked to this gravel road. This ended up being the correct road. It’s a 4 mile drive down these gravel roads, but they’re pretty passable roads.

Then I get to the parking area. The trail for the hike is pretty well marked. I start my hike along the wide trail (which is clearly also a road). As I’m walking along, I see these cows on the other side of some fencing…while some cows may seem “slow”, these cows seemed very wary of me, and they were very aware of my passing. I kept hiking. About halfway through the hike, you take a right through a gate and into a pasture. Realize you are now walking among the cows! For a while, I didn’t see any cows. As I reached this junction where you can head three different ways, I was about to take what I had read was the “easier” route when I saw a good 30 cows in my way. As I said before, these breed of cows seemed a bit more aware of their surroundings…much fitter and more active. So I backtracked a bit and took the “Upper Falls” trail. It climbed uphill for a bit, but it was still a pretty easy journey. After about a mile, I reached the Upper Falls.

You can see the Upper Falls here. Of the two falls, this is the easier one to capture without having to maneuver to weird spots. Be careful, though! There’s fencing there because I believe someone didn’t use their best judgment and it didn’t end well.

Directions:

  1. There are a number of different ways to arrive at the falls, though they all lead in the same general direction.  I was on CA-70 and entered the town of Marysville. I then took a left onto CA-20 (which you could follow toward the same set of roads).
  2. I turned left onto Ramirez Street, which turned into Simpson St.
  3. I then turned left onto Hammonton Smartsville Road. This is the road to focus on, because you will likely end up on this at some point, no matter the path.
  4. I drove just about 15 miles to the intersection of Hammonton Smartsville Road and turned right onto Chuck Yeager Road.
  5. I then drove 4.5 mile south on Chuck Yeager Road to Waldo Road. Waldo Road is a dirt road to your left, and it was somewhat easy to miss.
  6. Turn left on Waldo Road, and drive for two miles.
  7. Then take a left on Spencerville Road. Drive another 2 miles to the “end” of Spencerville Road. You will end up at a bridge that you cannot drive over and a large parking area.
  8. From this parking area, start along your journey. Cross the bridge over Dry Creek, and take a right immediately after crossing the bridge. You are actually still on Spencerville Road, just hiking now.
  9. Walk about a mile or so, and you will see a white fence/guardrail to your right that you can open. Turn right along this path, and walk along what is the obviously beaten path.
  10. After a 0.2 miles or so, you’ll see signs for the Upper and Lower Falls, each branching off. You will also be able to continue along a wider path to the falls. (The cows were on the wide path.) As long as you follow the creek, it tends to be difficult to miss the falls.

Accessibility: 6/10 (moderate, depends on the path, whether there are cows, and the last few hundred feet are uphill for sure)
Height: 47′
Hike: ~5 miles round trip

Where in the World is Upper Shingle Falls?